
In the age of remote work, video conferencing isn’t just a must–it’s a regular part of everyday life. But if you’re unsure on how to use Microsoft Teams video conferencing, it can be stressful here’s how to get started.
The proliferation of video conferencing throughout social interactions and business operations has caused telecommunications platforms to flourish. One of the most popular options is Microsoft Teams Rooms, a virtual co-working environment that integrates email, live chat, document editing, file sharing, remote storage, and video conferencing into one interface.
Given the number of features combined into Microsoft Teams, there’s a lot that can be done with it. Teams can help you easily share content, record meetings, search through file and chat archives, and create channels for specific tasks. And due to its flexible payment options, many organizations have opted to adopt it as their primary communications platform.
If your company has just started using Microsoft Teams for the first time, you might be wondering how to use teams for video conferencing. Here’s a guide that will help you learn how to video conference on Microsoft Teams and take advantage of the Teams
Getting started with Microsoft Teams
Step 1: Equip yourself with the proper hardware
Whether you’re working solo in a home office or preparing an office for a large number of employees, having the right audio and visual equipment is crucial for keeping your presentation professional. Before starting your first Microsoft Teams video conference, make sure that you have a high-quality camera and microphone to support you online.
Step 2: Sign up for a Microsoft Teams account
While it’s possible to join a call that someone else has scheduled without an account, you’ll need to register for a Microsoft Teams account to initiate calls and take advantage of all the features that the platform has to offer.
- To create an account using a desktop computer, visit the Microsoft Teams webpage. Click the “Sign Up For Free” button at the top right-hand corner of the site. You’ll then be prompted to enter your email address and password. Microsoft will send you an email with a link to verify your account. After you’ve clicked this link, your account will be ready to use.

- To create an account using a mobile device, you can also sign up on the Microsoft Teams website. However, you also have the option of signing up in the Microsoft Teams app. Tap the “Sign Up for Free” option on the app’s home screen. You’ll then be prompted to follow the same registration process described above: enter your desired email and password, verify your account, and voila–you’re ready to start conferencing.
Step 3: Download the Microsoft Teams App
Now that you’ve created your Teams account, it’s time to download the Microsoft Teams app.
- If you’re on a desktop computer, use this link to download the Microsoft Teams desktop application.
- If you’re on a mobile device:
- Use this link to download Microsoft Teams from the Google Play store.
- Click here to download Microsoft Teams from the Apple App Store.
- Use this link to download Microsoft Teams from the Google Play store.
After you’ve downloaded Microsoft Teams, sign in with your newly-created account.
Step 4: Create a team
After you’ve created your account and downloaded the Teams app, you’ll need to create the team that you’d like to have a video conference with.
- On desktop, click on the “Teams” tab on the left-hand side of the screen.
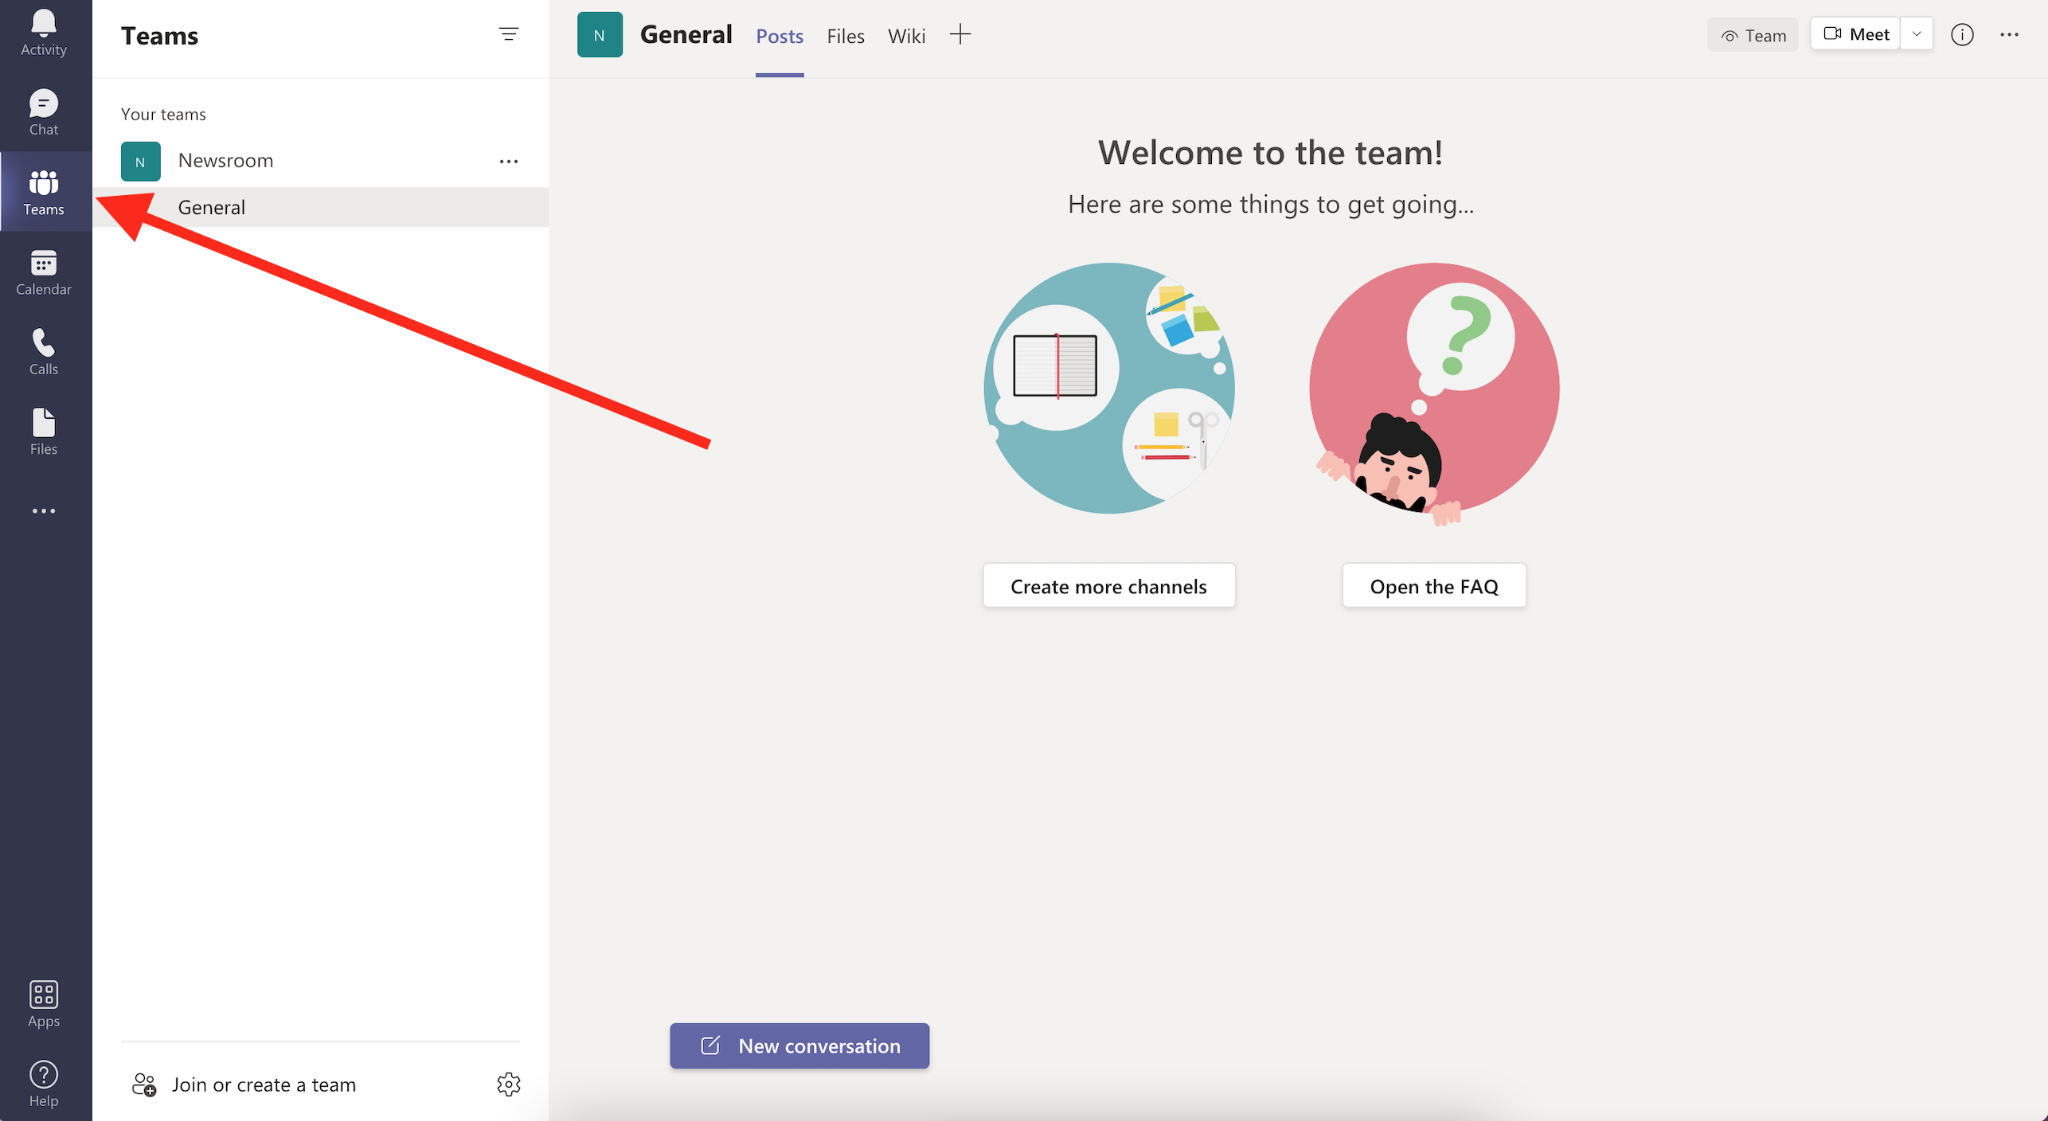
If you’ve already been added to a team, it will show up in the panel on the left. If you haven’t joined any teams, you can create one by selecting “Join or Create a Team” at the bottom of the panel.


If someone has given you a code to join a team, select “Join a team with a code.” To create a team, click “Create a team,” and follow the prompts that ensure. For additional help with creating a team, click here.

- Creating a team on the Teams mobile app is very similar to the desktop process. Simply select the “Teams” option on the bottom of the app screen and tap the + button on the top right-hand corner of the screen. You’ll then be prompted to create or join a team just as you would on the desktop application.


Step 5: Starting a video conference
After you’ve created or selected the time that you’d like to speak with, you can start your first video conference.
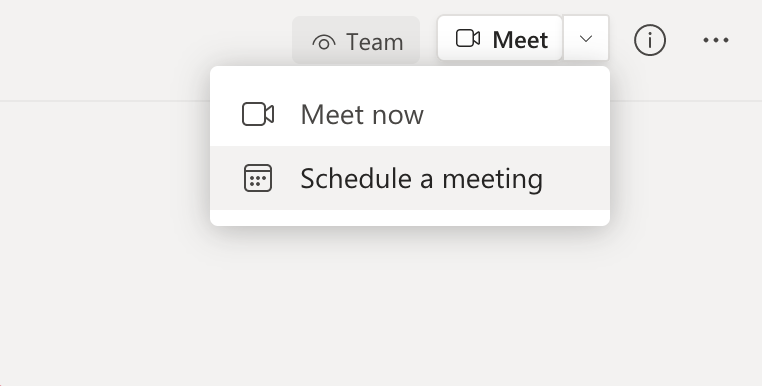
On Desktop: Microsoft Teams gives you the option to start a conference instantaneously or schedule one in advance. To start a meeting immediately, click directly on the “Meet” button at the top right-hand corner of the screen. To schedule a meeting later on, select the downward-facing arrow next to “Meet,” and then click “Schedule a meeting.”

To meet now, select “Meet.” To schedule a meeting, click the downward-facing arrow next to “Meet.”
Schedule a meeting in advance.
If you selected “Meet Now,” the app will open a pre-meeting prep screen. On this screen, you’ll have the option to name your meeting, add a virtual background, and switch your audio and video on and off. You’ll have the ability to add participants or share an invite link after the meeting has started.

If you start a meeting immediately, you’ll have the option to add participants or share an invite link when the meeting starts.
If you’ve selected “Schedule a meeting,” you’ll have the opportunity to provide a name, description, date, and time for your meeting, and to invite participants in advance.
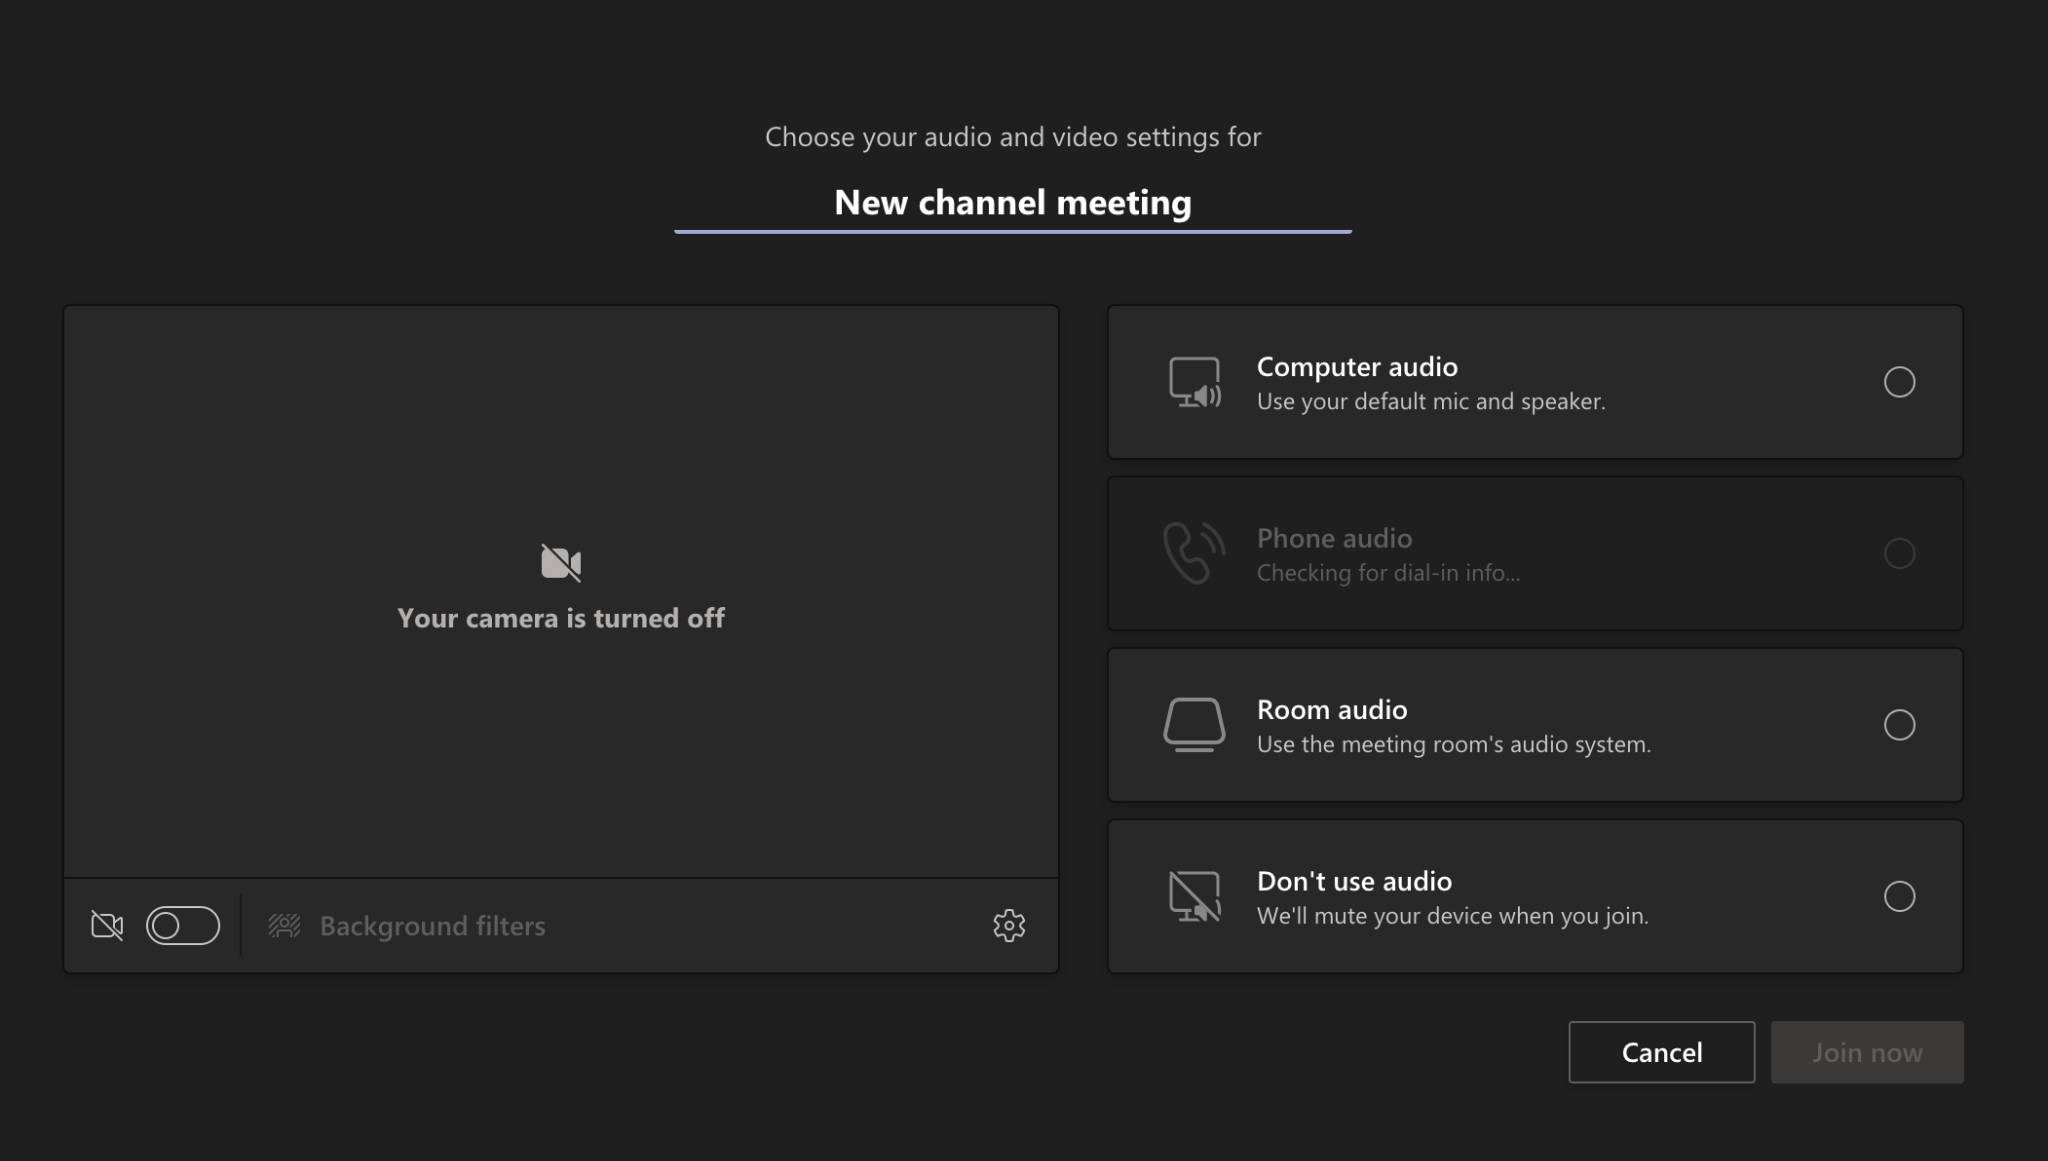
If you start a meeting immediately, you’ll be prompted to title the meeting and select your audio-visual options.
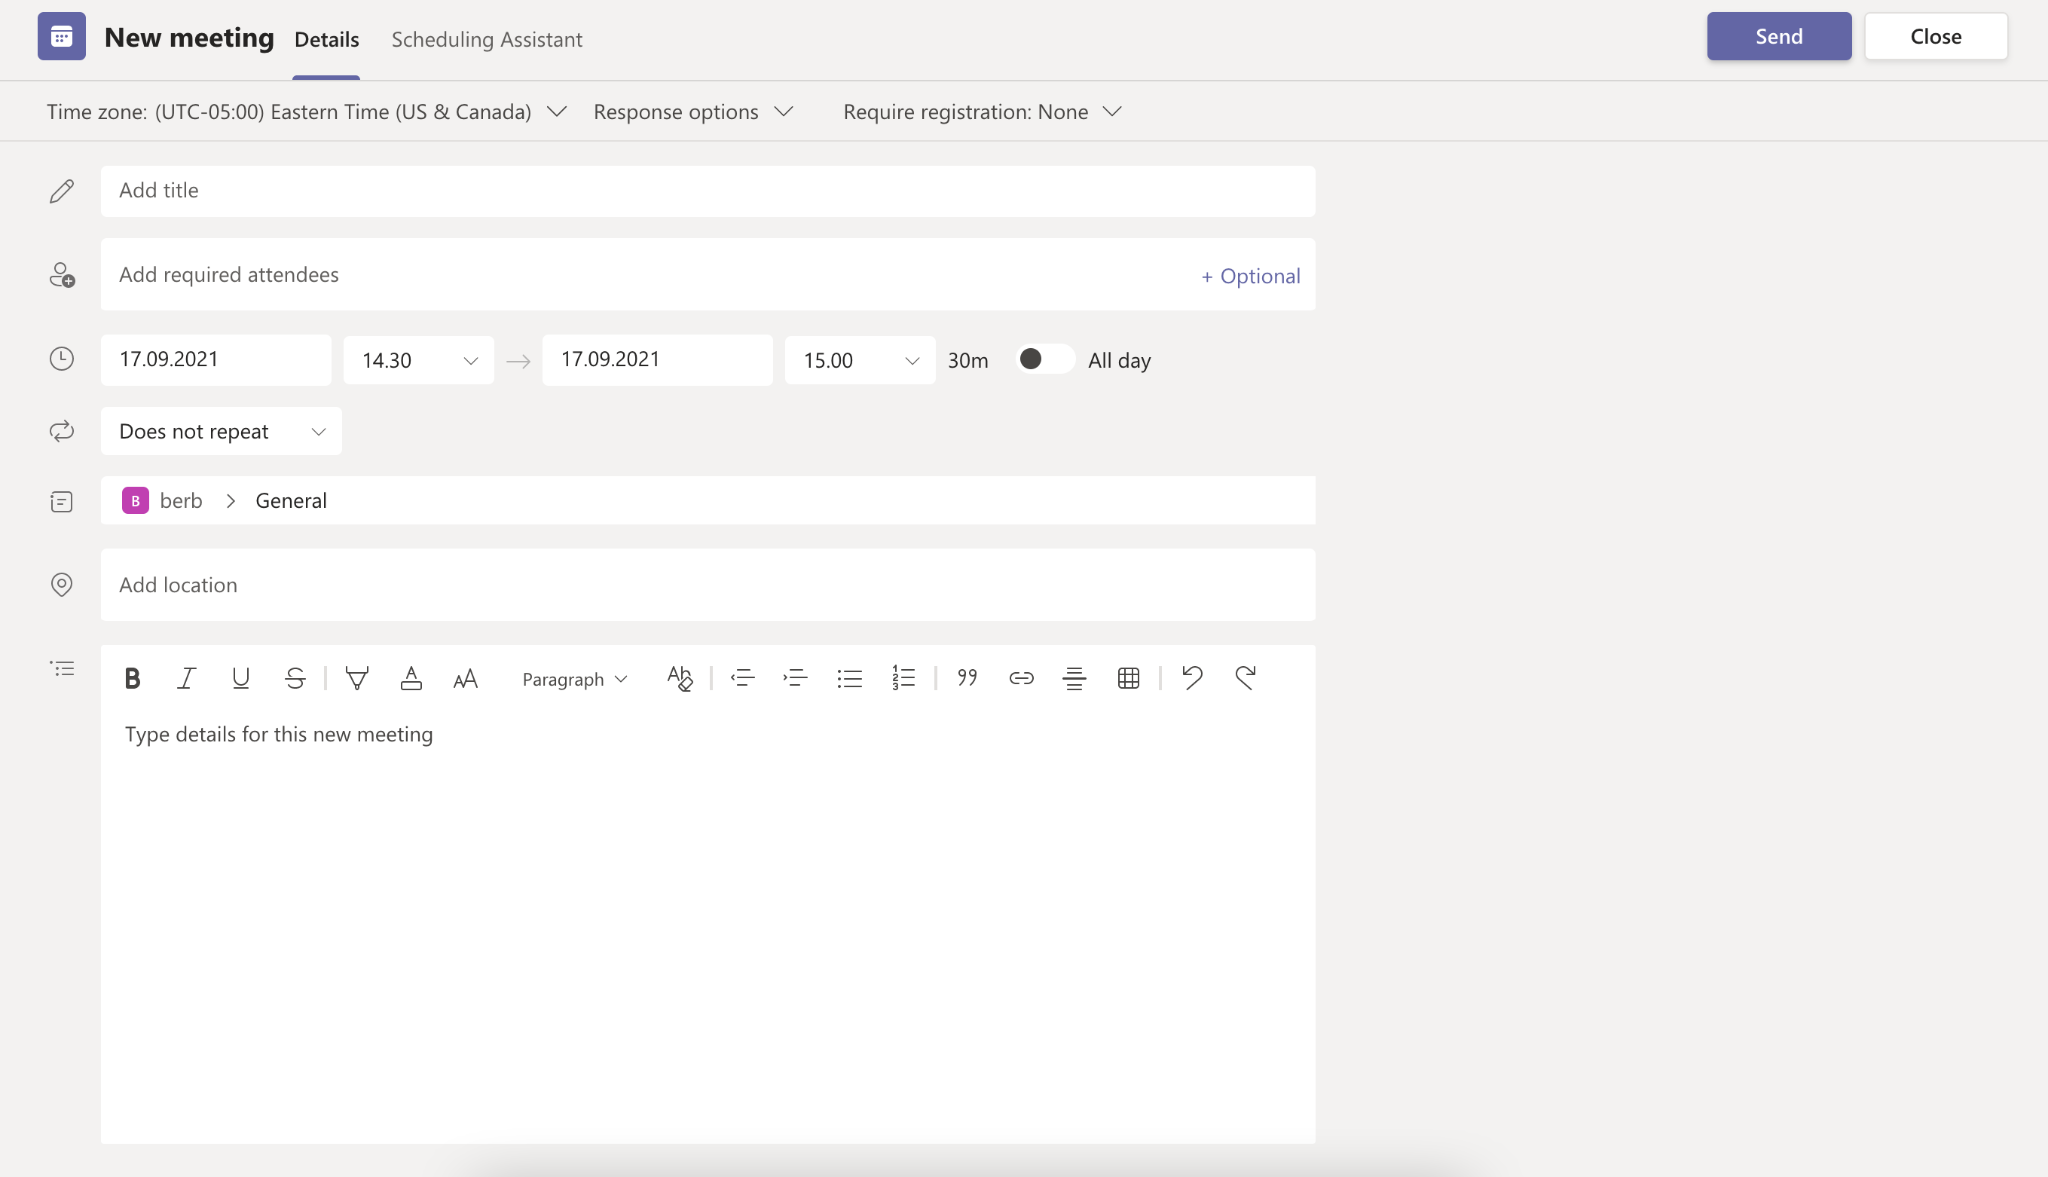
Scheduling a meeting in advance allows you to invite guests, and to provide a date, time, description, and more.
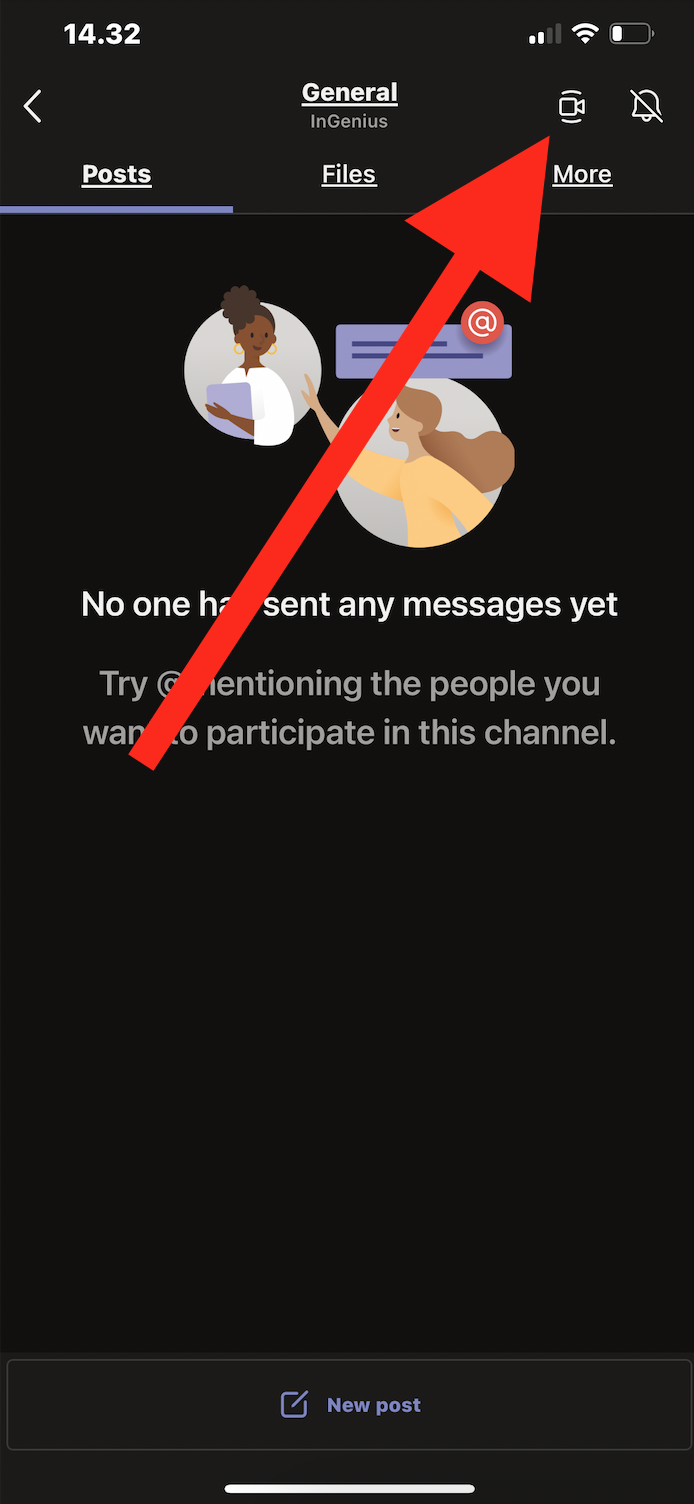
On Mobile: start a call immediately by selecting the team of your choice (and, if there is one, the channel of your choice.) If the team has no channels, simply select “General.” Then, click the video camera icon in the top right-hand corner of the screen.

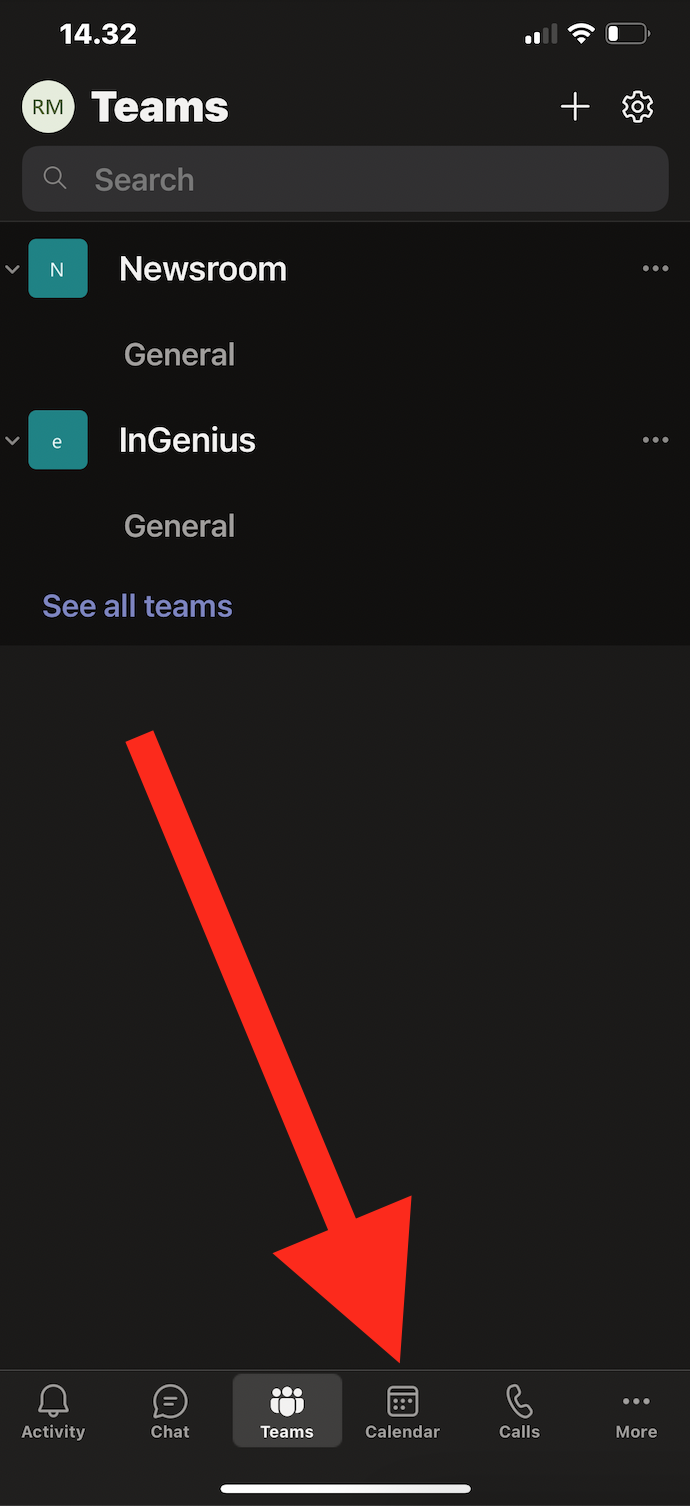
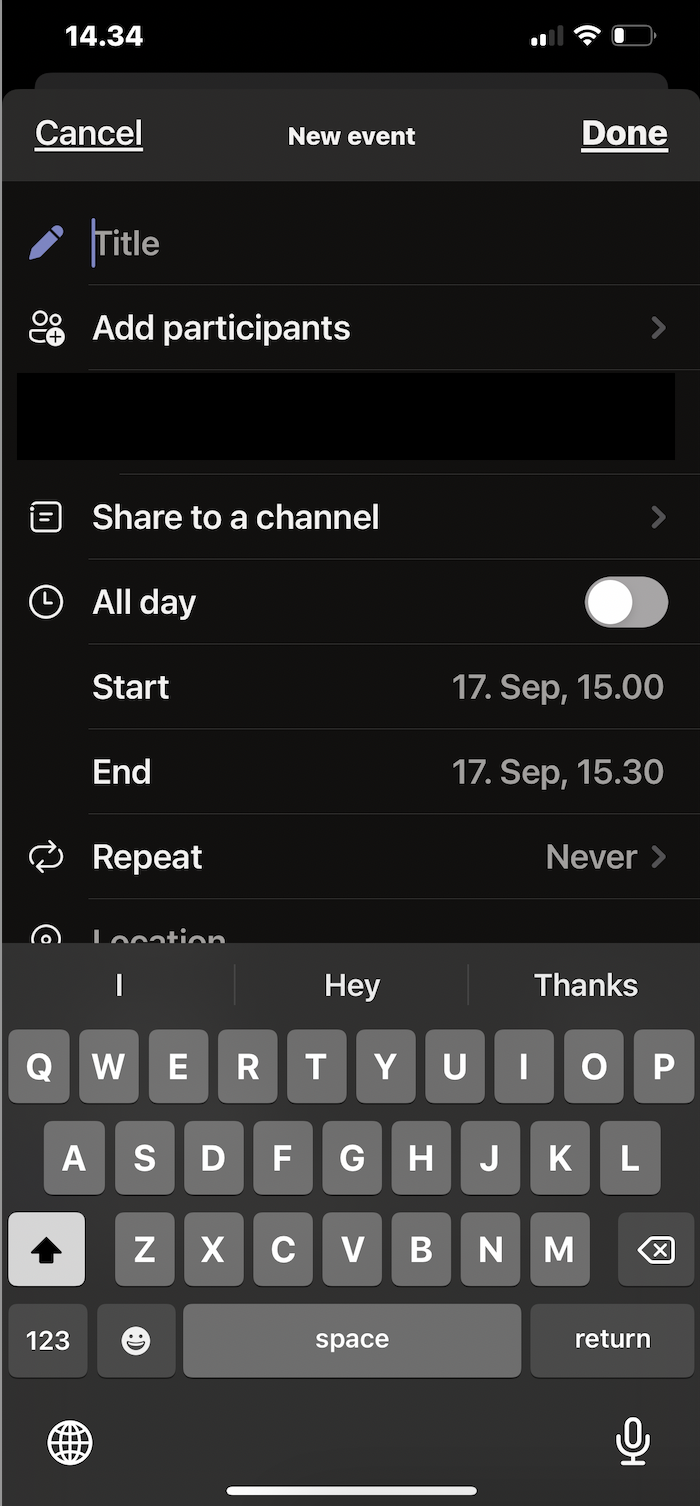
To schedule a call in advance on the Teams mobile app, click the “Calendar” icon on the bottom of the app’s home screen. Then, tap the + on the top left-hand of the screen. Enter the date, description, and time of the meeting, as well as the guests you’d like to invite.

Step 6: Using the Microsoft Teams’ video conferencing controls
Now that you’re in your Teams video conference, you have a number of options at your disposal.
- A video conference on Teams’ desktop app gives you several options at the top right-hand corner of the screen. Using these icons, you can view and hide the call’s participants, toggle the chat screen, react with emojis, and start breakout rooms (if you’re hosting the call).

Clicking the three dots at the far end of the screen opens up a host of further options, including recording the call, changing your device’s settings, turning off incoming video streams, and more.

The full menu of available options for Microsoft Teams video conferences.
You can also add apps to your Microsoft Teams video conferencing setup, including support for virtual whiteboards, sketching tools, and more. Watch the video below for more information on how to add apps to your conferences.
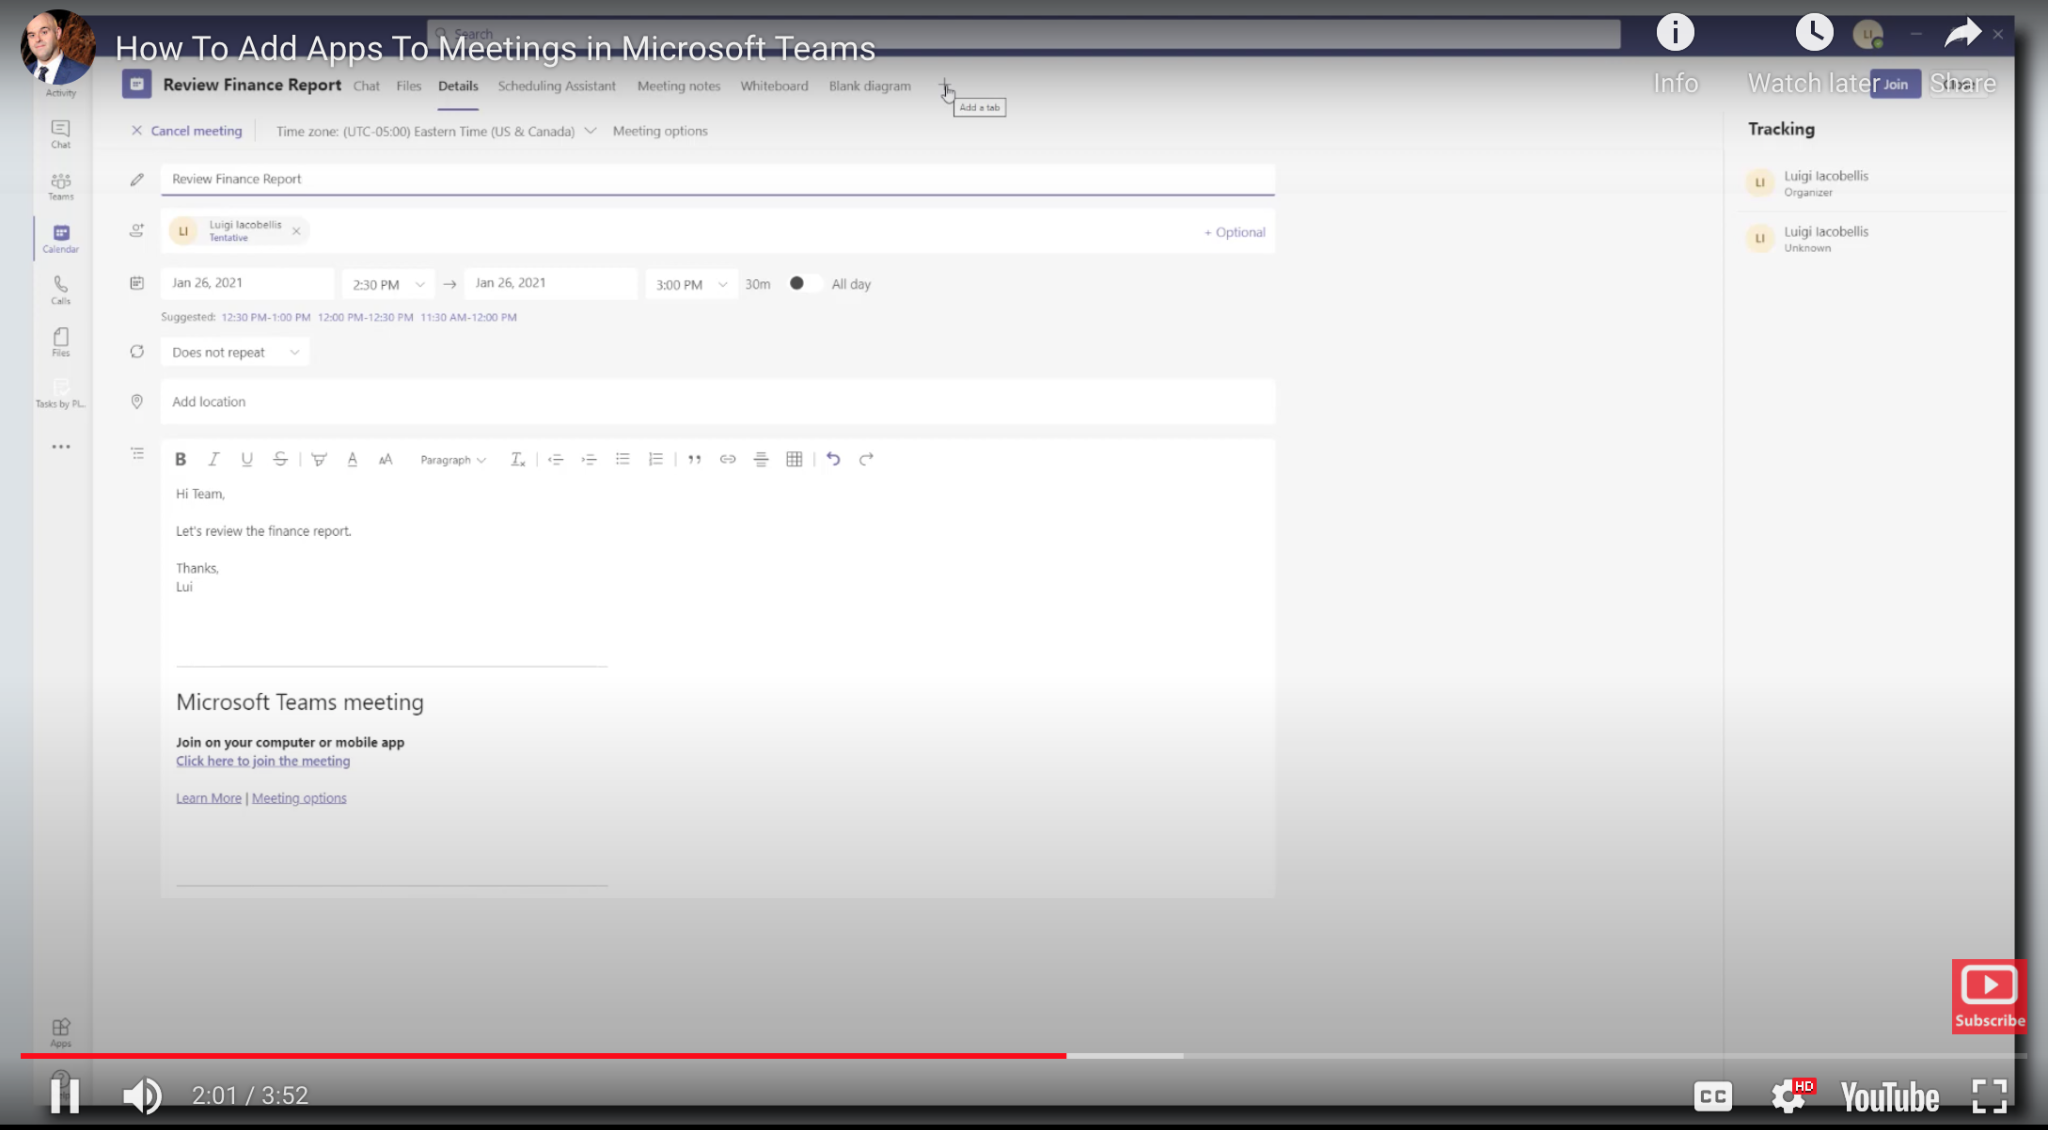
Embed video – https://youtu.be/THjRlitX970
- The list of available options for video conferences is somewhat limited on Teams’ mobile app. The three leftmost icons at the bottom of the meeting screen will allow you to toggle your audio and video on and off, and change how the meeting’s sound is played from your device.
- To view the complete list of available controls, including recording and locking the meeting, tap the three dots next to the hangup icon.


Getting Started with Zoom
Now that you’re an ace on Microsoft Teams video conference, here’s everything you need to know about Zoom. We’ve also created deep dives into how to use Zoom and how to use breakout rooms in Zoom.
Once you’re an expert with the top two video conferencing platforms, head on over to our detailed guide on getting your Zoom Room setup just right. Your productivity will thank you!